
Why use Contact Form 7 ?
Contact Form 7 is a free WordPress plugin that allows website owners to easily create and manage multiple contact forms on their website. The plugin provides a simple user interface that lets users create forms by adding various types of fields, such as text boxes, dropdowns, radio buttons, checkboxes, and more for more information and documentation you can visit the site https://wordpress.org/plugins/contact-form-7
What is Ascora API?
Ascora is a complete trade job management intended to smooth out the administration and tasks of developing trades and administration based organizations. Ascora empowers your business to keep on developing at an even faster speed while investing altogether less energy in administrator work. For more information you can visit official site https://www.ascora.com.au.
Getting Started:
After our successful team efforts we’ve developed an extension that will integrate Contact Form 7 with Ascora Api, by using this extension you can easily submit your site enquiries to Ascora where you can easily manage your enquiries and follow up them.
Establishing and maintaining a healthy relationship with clients and customers is essential to keep a business thriving. One of the most popular WordPress plugins that help website owners collect important data from visitors is Contact Form 7 (CF7). Ascora, on the other hand, is a robust CRM platform that caters to businesses of all sizes. Ascora leads and Ascora CRM are two of its best features that can boost a business’s performance. In this post, we will delve into the benefits of using the Contact Form 7 extension for Ascora, a new plugin that seamlessly integrates CF7 forms with Ascora leads and Ascora CRM. Our discussion will revolve around how this plugin can enhance communication and streamline the process of lead generation and customer management for businesses.
Why do you need to integrate Contact Form 7 With Ascora Api?
Contact Form 7 permits you to add subscribers to Acora Enquiries list efficiently and gives the following advantages:
- Contact Form 7 empowers you to automate the addition and labeling of new contacts.
- Not any more manual contact entries are required.
- Add contacts to your automated email marketing campaigns.
- Need a registration form to match your website’s theme? you need not worry, you can customize Contact Form 7’s design as you like.
- Form input fields are completely manageable. Also, all information can be sent to Ascora for additional utilization.
- Sign-up forms are more flexible with Contact Form 7. Show them anywhere you need utilizing the Contact Form 7 short-code.
Key Features:
- Unlimited contact forms.
- Supports customizable input fields.
- Use a unique Ascora API key for each contact form.
- Map desired form fields to Ascora Api
- Multiple fields to post Subscriber’s information to Ascora
Premium Features:
- Create Unlimited Ascora Enquiries
- Unlimited Ascora Custom Fields
- Ascora Follow up option
- Upload Pictures/Files
- Import/Export all Enquiries
- Send Emails/Messages
- Convert Enquiries to Quotes/Jobs
- Open/Close Enquiries
Getting Started:
Contact Form 7 Configuration:
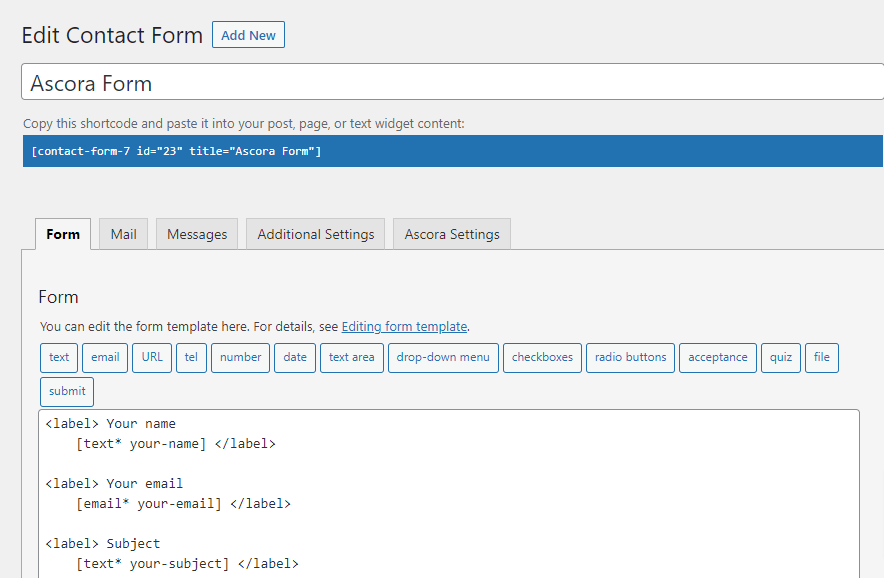
1- Create and save a new contact form, here in the below image you can see a shortcode text like [contact-form-7 id=”23″ title=”Ascora Form”] you have to copy this short-code and paste this code either on page in short-code block or in any other section where you want to show this Contact Form you’ve created as shown in the image below:

2- After pasting this form’s short-code on page, publish the page and view page you will see a Contact Form 7 will appear on the page you’ve created in the Contact Form 7 menu.
Ascora API Configuration:
How to Generate Ascora API Key?
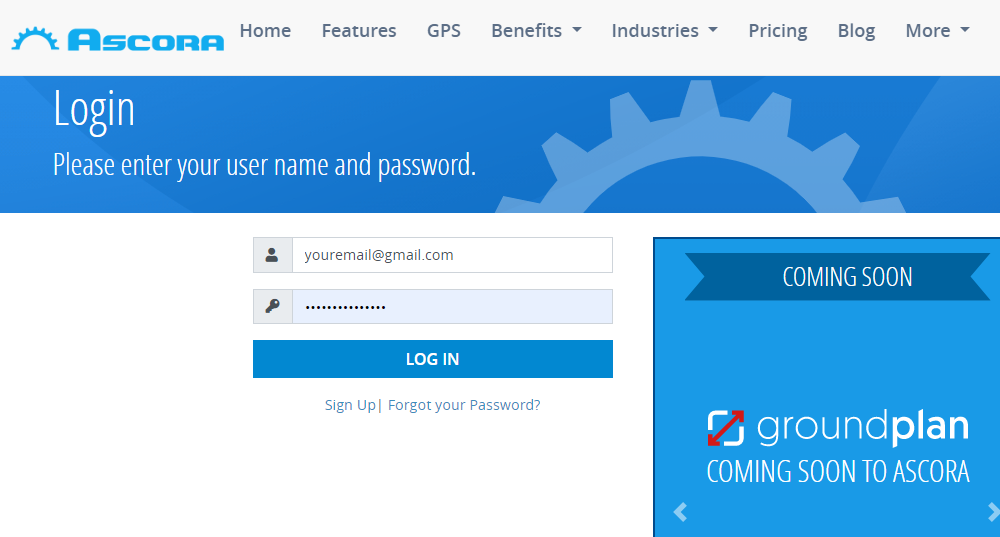
1- In order to generate a new Ascora Api key, go to the official site of Ascora https://ascora.com.au/
2- Login to your account if you have already created an account on Ascora site else you can Create a new account by simply signing up on the site.
Note: Ascora will provide a startup login free trial of 14 Days after that period you have to purchase the premium package in order to continue using Api.
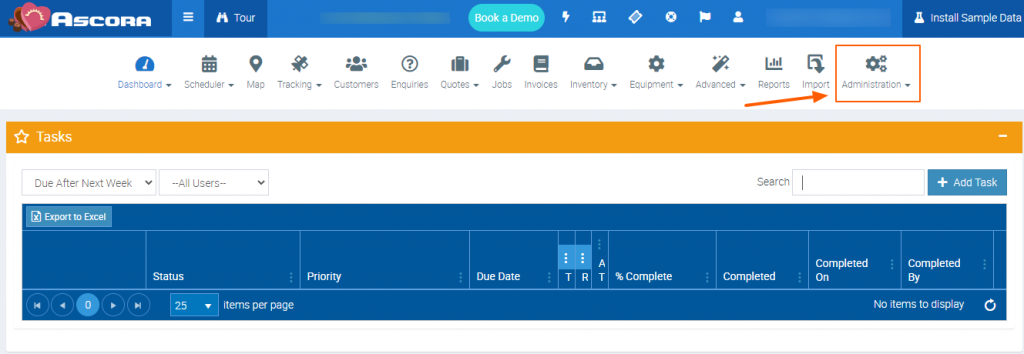
3- After successful login, you will see the Dashboard and multiple site options in the menu bar like Scheduler, Map, Tracking and at last option Administration, Click on the Admininstration menu from menu bar, here you will see a dropdown options list where you can select and manage Ascora settings, in this menu the last option you will see Api Settings click this as in the image below:
4- Clicking on the Api settings menu you will find Generate New Api Key field here, by clicking this button you can generate new Api Key that will connect your contact Form 7 Fields with Ascora Api to Post data from Contact Form 7 to Ascora as like below:
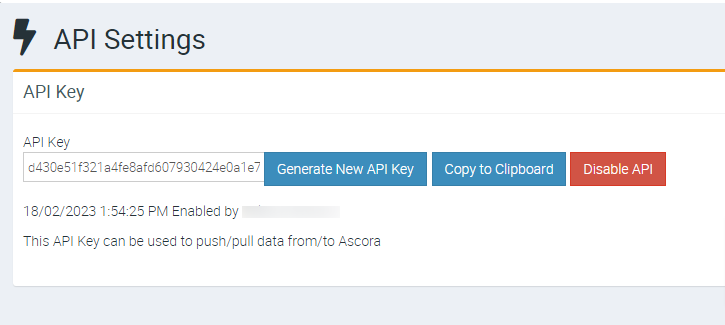
5- The last step in this part is to copy generated Api Key from here and save this Api key.
Connect Contact Form 7 with Ascora Api:
To connect Contact Form 7 with Ascora we will use our extension PSILO | Contact Form 7 Extension For Ascora using below steps:
1- Go to your WordPress site’s wp-admin where you have installed Contact Form 7 plugin.
2- Download & Install Contact Form 7 Extension Ascora By Buying/Ordering the Plugin in $10 USD from here Buy/Order Plugin
3- Activate Contact Form 7 First before Activating the Ascora extension because this extension only works after Contact Form 7 is activated, if you activate this extension without activating the Contact Form 7, it will show a notice on your site’s Dashboard and automatically deactivated as shown in the image below:

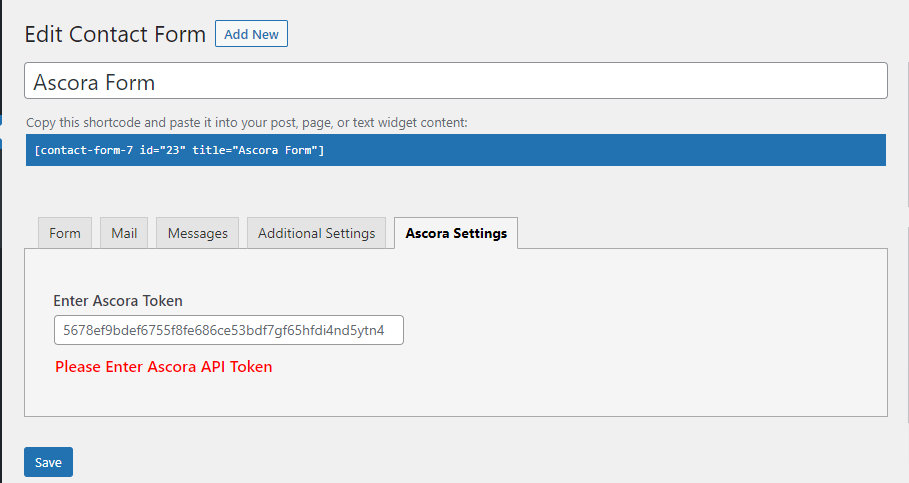
4- After Activating both plugins you have to open your Contact Form 7 Settings Page where you have created the form to connect with Ascora Api, here you will find an additional tab with Contact Form 7 tabs as Ascora Settings as you can see in the image below:
5- Click on Ascora Settings tab, here you are seeing an input field “Enter Ascora Api Key” here you have to enter the Ascora Api key you have generated and saved from Ascora Api site, click save settings it will check if your Api key is correct or not.
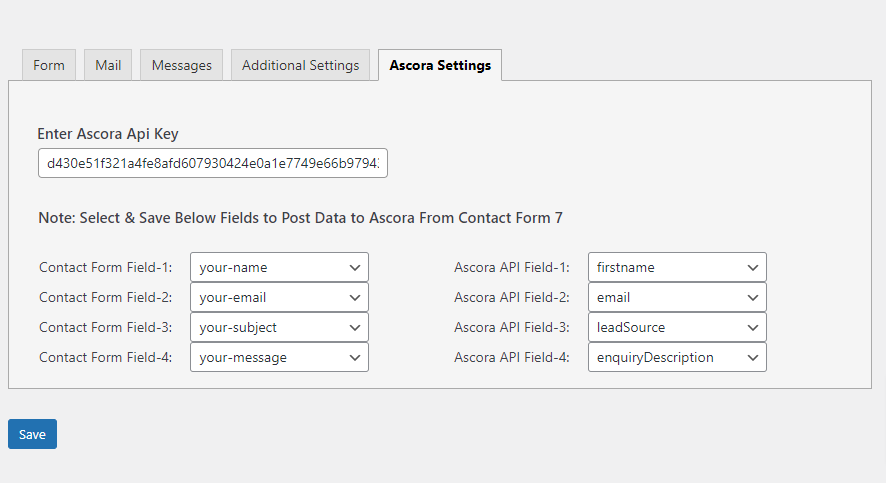
6- If the key is valid it will show two dropdown options like “Contact Form Fields” (All input fields you have created in your Contact Form 7 Form tab) Option and “Ascora Api Field”(Ascora Api Fields).
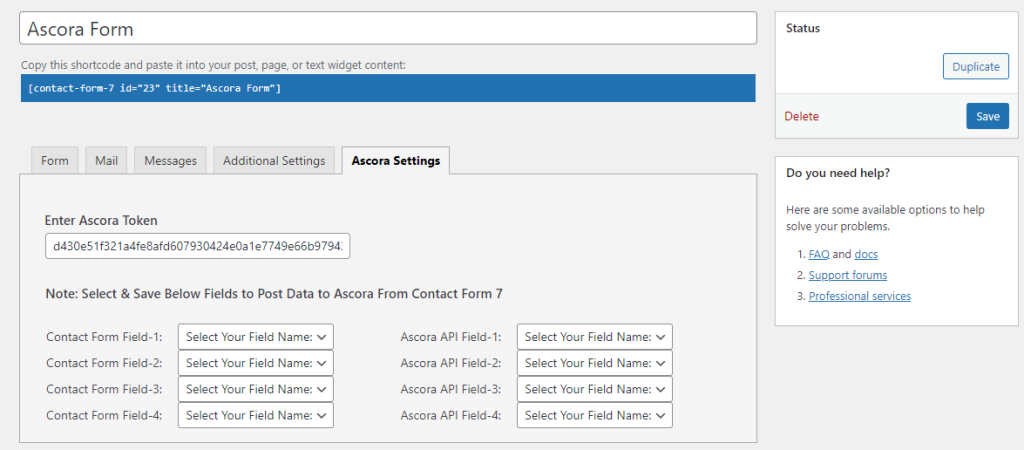
7- Now on this tab you have to select your Contact Form 7 each Field you want to map/post to Ascora Field on Api through form submission it will post the form fields data to the Api Enquiries table Columns where you can manipulate these inquiries as shown in the image below:
8- Save the Settings by clicking Save button on the settings menu and open the page where you have pasted the short-code of this contact form created earlier.
9- Here you will on the page a form will appear just fill the form and submit the form it will show success message that your mail has been sent successfully.
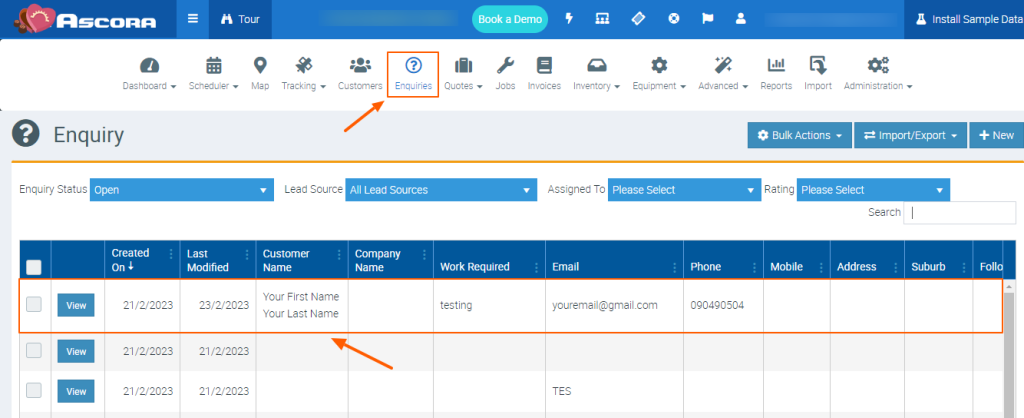
10- At the end you have to open Ascora Api site Dashboard and here you will find “Enquiries” option in menu bar if the form and settings are saved correctly you will see here all Enquiries created through Contact Form 7 as shown in the image below:
Here’s all hope you will enjoy using this extension#ascora #cf7 #wordpress #plugin #crm #contactform7 #leadgeneration #customerrelationshipmanagement #businessautomation #webdevelopment #onlinemarketing #digitalmarketing #smallbusiness #entrepreneur #productivity #yashapifixer